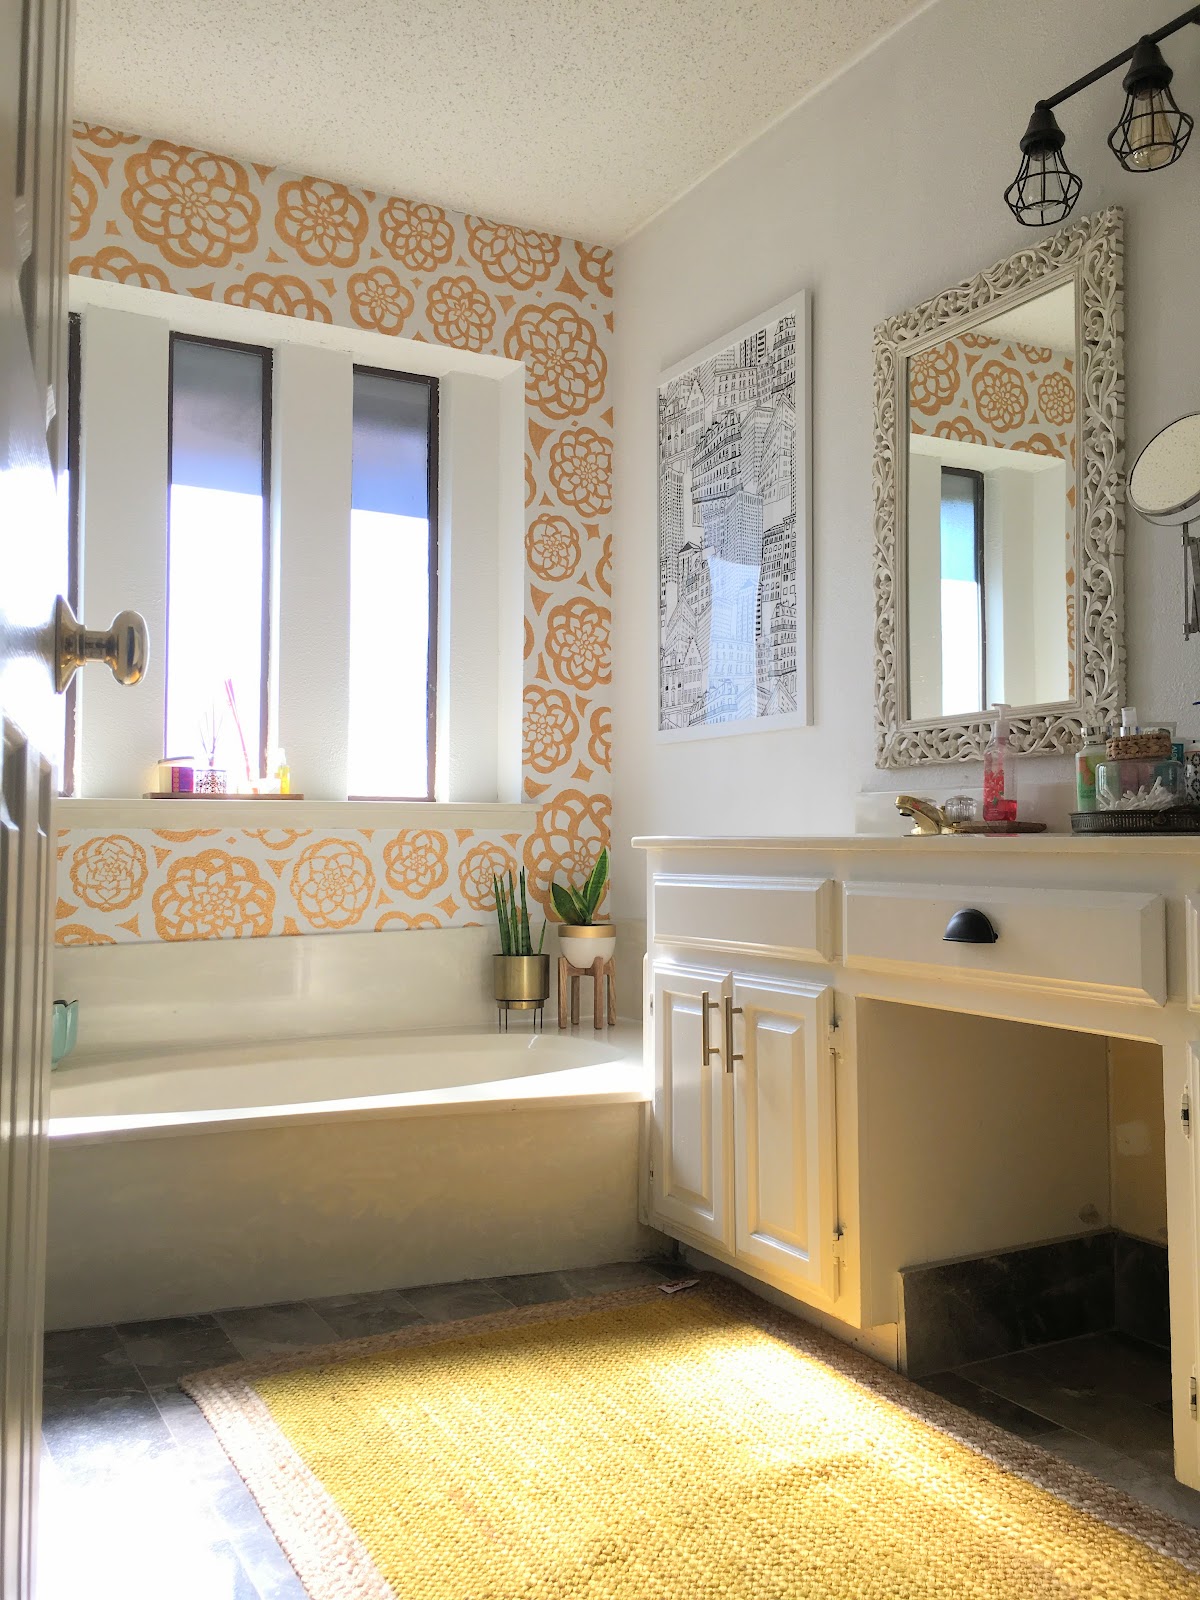
Art: hand painted wall in gold
Ever since we moved into this house more than a year ago, I have been planning this project to do a pattern on the wall. As much as I love simple white walls, I felt that these three tall windows by the vintage bathtub needed to be framed. I have thought about doing a wall paper but all the walls of this house are textured and I would have to sand it down before applying the wallpaper. Also, whenever I see a wallpaper or a stencil I feel bold enough to be able to paint it myself. As in....why wouldn't I just draw it! Stencils and wall papers are great - I love them. But this was a small surface that I felt I could take on with my free hand. What happened when I did it freehand instead of a stencil is that it became organic. No matter how much I tried, I could not get the exact same flower pattern to repeat itself. And this is what gives it it's uniqueness. And I knew that if I messed up, I could just paint white over it.

The image below is the original bathroom that came with the house. Here is the post of the remodel we did to it when we moved in.

This is what it looked like before I started to paint on the gold flowers. I had a tree decal with multiple colorful birds sitting on it. It was very pretty but because of the textured walls, the decal would not stick right. There were areas I had it pinned to the wall because it refused to stay put.

At first I started by creating a pattern and then drawing that pattern over and over again, creating some big and some small ones.

Then I drew my first gold flower on the wall. It took me a long time because painting on smooth paper vs painting on textured wall are total opposites. I only realized this as soon as my brush touched the wall.

I also began to find out that the flowers I drew on paper are not going to match the ones on the wall. All because of the texture.

So I gave in to the wall and let it dictate the pattern. None of the flowers look exactly like the other but they were similar and therefore I feel it worked.

It was tough to do corners and imagine the parts that disappeared and reappeared from outside the edges.

Here you can see how I would lightly outline the pattern and then trace it back with thicker paint.

I used a regular small brush and Acrylic Paint in the color Antique Gold.

As the pattern started climbing higher it became tougher to paint. And I would go days on without having touched the wall. I started this project in mid March and this is the month of May...so you can imagine.

I did not like painting at night. I don't really know why but I enjoyed it more when the bathroom was filled with daylight.

The wall surface on top is wider than the rest of the surface around the windows. I had to really think of how to fit in the pattern in there since everything was organic. I just painted as I went on, and I am glad it worked out and I did not suddenly run out of space for a decent sized flower.

I had placed two stools inside the bathtub to reach the top wall. My arms would get super tired from being elevated for so long.

This was the last little space to fill in and I finished it last night by pretty much forcing myself. I am glad I did it because now I can share it with you all.

I had ordered this rug last month to compliment the gold on the wall. The tiles being grey and the walls being white give this bathroom a stark feel. The gold and the yellow bring the warmth that was much needed in this space.

I also bough a large white frame and a cityscape printed shower curtain. I then cut out the shower curtain and framed it as a photo. I chose a black and white image because I want the wall pattern and the rug to dominate the space.

I have a few plants in the bathroom now but my goal is to add more. I realized that this bathroom gets beautiful natural light which is ideal for houseplants. All in all I think I am quite content with this bathroom. Now let's see how long that lasts ;)


Table lamps, as the name suggests, are light shades used either on a table, desk or near a bedside. It is much smaller than a ceiling light and a floor lamps but serves its purpose of lighting a room in a very subtle way. It provides ambient lighting, down lighting or up lighting depending on the shades. https://www.claxy.com/color/oil-rubbed-bronze/
ReplyDelete